Willkit RP41701 Delta Faucet Stop Leak at Base if Faucet: A Complete Troubleshooting Guide
Is your Delta faucet leaking at the base, causing water damage and frustration? You’re not alone. Many homeowners experience this issue, often stemming from worn-out parts within the faucet assembly. This comprehensive guide focuses specifically on addressing leaks in Delta faucets, particularly when the Willkit RP41701 is involved. We’ll delve into the common causes of these leaks, provide step-by-step troubleshooting instructions, and offer expert tips to help you resolve the problem effectively. Our goal is to equip you with the knowledge and confidence to tackle this plumbing challenge yourself, saving you time and money while ensuring a long-lasting repair. This guide goes beyond simple fixes, providing a deep understanding of the faucet’s inner workings and how the RP41701 kit plays a crucial role in stopping those annoying leaks.
Understanding Delta Faucet Leaks at the Base
A leaky faucet, especially at the base, can be more than just an annoyance. It can lead to water wastage, potential water damage to your countertop and cabinets, and even mold growth. Understanding why these leaks occur is the first step towards fixing them. Several factors can contribute to leaks at the base of a Delta faucet:
- Worn-out O-rings and Seals: These rubber components provide a watertight seal between different parts of the faucet. Over time, they can dry out, crack, or become brittle, leading to leaks.
- Loose Connections: The connections between the faucet body, spout, and water supply lines can loosen over time due to vibrations or temperature changes.
- Damaged Cartridge: The cartridge controls the flow of water. If it’s damaged or worn, it can cause leaks, drips, or inconsistent water flow.
- Corrosion: Mineral deposits and corrosion can build up on the faucet components, interfering with their proper function and causing leaks.
- High Water Pressure: Excessively high water pressure can put stress on the faucet components, accelerating wear and tear and increasing the likelihood of leaks.
Identifying the specific cause of the leak is crucial for choosing the right repair strategy. In many cases, the Willkit RP41701 provides the necessary replacement parts to address the most common causes of leaks at the base of Delta faucets.
The Role of the Willkit RP41701 in Stopping Leaks
The Willkit RP41701 is a comprehensive repair kit designed specifically for Delta faucets. It typically includes a variety of replacement parts, such as O-rings, seals, springs, and other small components that are prone to wear and tear. The kit is designed to address common leak issues, restoring the faucet to its original performance. According to Delta faucet repair specialists, using the RP41701 kit is often the most effective way to resolve leaks, as it replaces all the critical wear parts at once, ensuring a more reliable and long-lasting repair.
The specific components included in the RP41701 kit may vary depending on the faucet model. However, it generally includes the following:
- O-rings of various sizes: To seal connections between different faucet parts.
- Seats and Springs: These components work together to control water flow and prevent drips.
- Cartridge (in some kits): The cartridge is the main control mechanism for the faucet.
- Washers: To provide a tight seal between the faucet and the sink.
- Grease: To lubricate the faucet components and ensure smooth operation.
Using the correct RP41701 kit for your specific Delta faucet model is essential. Refer to your faucet’s documentation or Delta’s website to identify the correct kit number. Using the wrong kit can result in improper fit and ineffective repairs.
Step-by-Step Guide to Fixing a Leaky Delta Faucet with the RP41701
Before you begin, gather the necessary tools and materials:
- Willkit RP41701 (correct kit for your faucet model)
- Adjustable wrench
- Screwdriver (Phillips and flathead)
- Pliers
- Penetrating oil (e.g., WD-40)
- Clean cloths or rags
- Flashlight
- Basin wrench (optional, for hard-to-reach areas)
Safety First: Turn off the water supply to the faucet before you begin any repairs. Locate the shut-off valves under the sink and turn them clockwise until they are completely closed. If you don’t have shut-off valves, you’ll need to turn off the main water supply to your house.
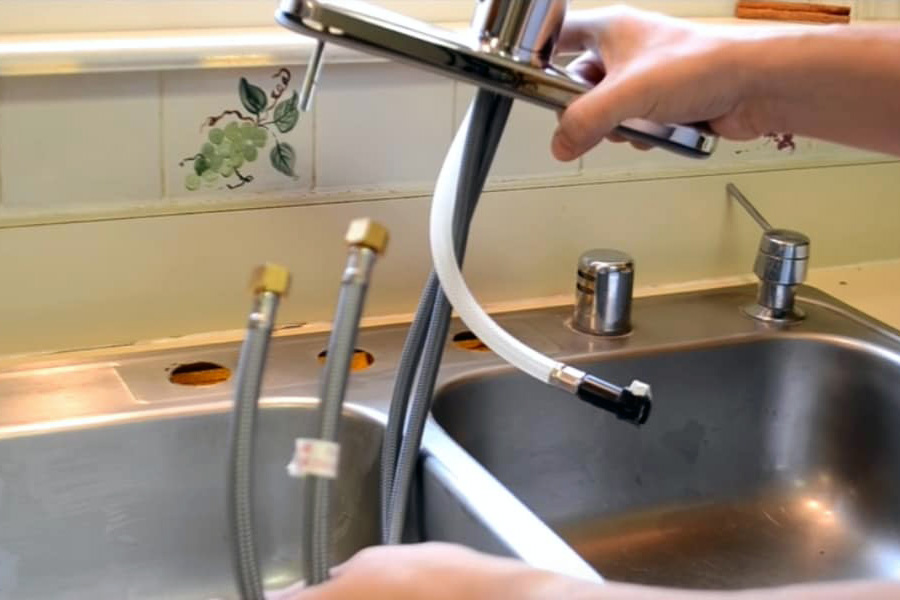
Step 1: Disassembling the Faucet
- Remove the Handle: Depending on your faucet model, the handle may be held in place by a screw or a set screw. Locate the screw (it may be hidden under a decorative cap) and use the appropriate screwdriver to remove it. Once the screw is removed, carefully lift the handle off the faucet body.
- Remove the Escutcheon (if applicable): The escutcheon is the decorative plate that covers the faucet base. It may be held in place by screws or clips. Remove any screws or clips and carefully lift the escutcheon off the faucet body.
- Remove the Retaining Nut or Clip: The retaining nut or clip holds the cartridge in place. Use an adjustable wrench or pliers to loosen and remove the retaining nut. If it’s a clip, use a screwdriver to gently pry it out.
- Remove the Cartridge: Carefully pull the cartridge straight up and out of the faucet body. If it’s stuck, try gently wiggling it back and forth while pulling. Be careful not to damage the cartridge or the faucet body.
Step 2: Replacing the Worn Parts with the RP41701 Kit
- Inspect the Cartridge and Faucet Body: Examine the cartridge and faucet body for any signs of damage, such as cracks, corrosion, or mineral buildup. Clean any debris or mineral deposits with a clean cloth and penetrating oil.
- Replace the O-rings and Seals: Remove the old O-rings and seals from the cartridge and faucet body. Use a small screwdriver or pick to carefully pry them out. Be sure to note the location of each O-ring and seal so you can replace them in the correct positions. Install the new O-rings and seals from the RP41701 kit. Lubricate them with the grease provided in the kit to ensure a smooth fit and prevent future wear.
- Replace the Seats and Springs: Locate the seats and springs in the faucet body. Remove the old seats and springs and replace them with the new ones from the RP41701 kit.
- Replace the Cartridge (if included in the kit): If the RP41701 kit includes a new cartridge, replace the old cartridge with the new one. Make sure the cartridge is properly aligned before inserting it into the faucet body.
Step 3: Reassembling the Faucet
- Reinstall the Cartridge: Carefully insert the cartridge into the faucet body, making sure it’s properly aligned.
- Reinstall the Retaining Nut or Clip: Secure the cartridge in place by reinstalling the retaining nut or clip. Tighten the nut with an adjustable wrench, but be careful not to overtighten it.
- Reinstall the Escutcheon (if applicable): Reinstall the escutcheon, making sure it’s properly aligned and secured with screws or clips.
- Reinstall the Handle: Reinstall the handle, making sure it’s properly aligned and secured with the screw or set screw.
Step 4: Testing the Faucet
- Turn on the Water Supply: Slowly turn on the water supply to the faucet.
- Check for Leaks: Carefully inspect the faucet for any leaks around the base, handle, and spout. If you see any leaks, tighten the connections or replace the O-rings and seals again.
- Test the Water Flow: Turn the faucet on and off to test the water flow. Make sure the water flows smoothly and there are no drips or leaks when the faucet is turned off.
Advanced Troubleshooting Tips
Even after replacing the worn parts with the RP41701 kit, you may still encounter some issues. Here are some advanced troubleshooting tips:
- Still Leaking at the Base: If the faucet is still leaking at the base after replacing the O-rings and seals, check the faucet body for cracks or corrosion. If you find any damage, you may need to replace the entire faucet.
- Low Water Pressure: If the water pressure is low after the repair, check the aerator for mineral buildup. Remove the aerator and clean it with a brush or soak it in vinegar.
- Noisy Faucet: If the faucet is making noise, such as a squealing or whistling sound, lubricate the cartridge and O-rings with grease.
- Handle is Difficult to Turn: If the handle is difficult to turn, lubricate the cartridge and handle stem with grease.
Preventing Future Leaks
To prevent future leaks, consider these preventative measures:
- Regularly Inspect Your Faucets: Check your faucets for leaks or drips on a regular basis. Early detection can prevent minor issues from becoming major problems.
- Maintain Water Pressure: Ensure your home’s water pressure is within the recommended range (typically 40-60 PSI). High water pressure can damage faucet components and cause leaks.
- Use a Water Softener: If you have hard water, consider using a water softener to reduce mineral buildup on your faucets and plumbing fixtures.
- Lubricate Faucet Components: Periodically lubricate the faucet components, such as the cartridge and O-rings, with silicone grease to prevent wear and tear.
- Replace Worn Parts Promptly: Don’t wait until a faucet is leaking to replace worn parts. Replace O-rings, seals, and cartridges as soon as you notice signs of wear, such as drips or inconsistent water flow.
Choosing the Right Willkit RP41701 for Your Delta Faucet
Selecting the correct RP41701 kit is paramount for a successful repair. Delta offers a variety of kits tailored to specific faucet models. Using the wrong kit can lead to incompatibility issues and ineffective repairs. Here’s how to ensure you choose the right one:
- Consult Your Faucet’s Documentation: The most reliable way to identify the correct RP41701 kit is to refer to your faucet’s original documentation. The manual should list the specific kit number required for your model.
- Visit Delta’s Website: Delta’s official website provides a comprehensive parts finder tool. You can typically enter your faucet model number to identify the compatible RP41701 kit.
- Contact Delta Customer Support: If you’re unsure, contact Delta’s customer support team. They can assist you in identifying the correct kit based on your faucet model and the specific leak issue you’re experiencing.
- Check Online Retailer Compatibility Charts: Many online retailers that sell the RP41701 kit provide compatibility charts that list the faucet models the kit is designed for. Cross-reference your faucet model with these charts to confirm compatibility.
Real-World Value and Advantages of Using the RP41701
Using the Willkit RP41701 to repair a leaky Delta faucet offers numerous advantages and real-world value for homeowners:
- Cost Savings: Repairing a faucet with the RP41701 kit is significantly cheaper than replacing the entire faucet or hiring a professional plumber. The kit typically costs a fraction of the price of a new faucet or a plumber’s service call.
- Water Conservation: Fixing a leaky faucet can save a significant amount of water over time. Even a small drip can waste gallons of water per day, leading to higher water bills and environmental impact.
- Prevention of Water Damage: Leaks can cause water damage to your countertops, cabinets, and flooring. Repairing the leak promptly with the RP41701 kit can prevent costly repairs and potential mold growth.
- Extended Faucet Lifespan: By replacing worn parts with the RP41701 kit, you can extend the lifespan of your faucet and avoid the need for premature replacement.
- DIY Satisfaction: Repairing a faucet yourself can be a rewarding experience. It gives you a sense of accomplishment and empowers you to handle basic plumbing repairs around your home.
- Convenience: The RP41701 kit provides all the necessary parts in one package, making the repair process more convenient and efficient. You don’t have to search for individual parts or make multiple trips to the hardware store.
A Trustworthy Solution for a Common Problem
The Willkit RP41701 offers a reliable and cost-effective solution for fixing leaky Delta faucets. By understanding the causes of leaks, following the step-by-step repair guide, and taking preventative measures, you can effectively resolve the problem and enjoy a leak-free faucet for years to come. Remember to choose the correct RP41701 kit for your specific faucet model and consult Delta’s resources or customer support if you have any questions. Taking the time to properly diagnose and repair the leak will not only save you money but also contribute to water conservation and the overall maintenance of your home.
