Mastering the 36 Yard Zero: Adjusting Your Rifle for 25 Yard Accuracy
Achieving consistent accuracy with a rifle requires understanding and mastering the concept of zeroing. A crucial aspect of this is knowing how to effectively adjust your zero target, particularly when dealing with the relationship between a 36-yard zero and a 25-yard adjustment. This comprehensive guide explores the intricacies of the “36 yd zero target adjuted to 25,” providing you with the knowledge and techniques to optimize your rifle’s performance for various shooting scenarios. We’ll delve into the underlying principles, practical applications, and expert tips to help you achieve pinpoint accuracy.
Understanding the Ballistics of a 36 Yard Zero
The term “zero” refers to the distance at which your bullet’s trajectory intersects with your line of sight. When you zero your rifle at 36 yards, you’re essentially aligning your sights so that the bullet hits your intended point of impact at that specific distance. However, understanding what happens before and after that 36-yard mark is crucial for effective shooting at other ranges. The bullet’s trajectory is an arc, meaning it will cross your line of sight twice – once on the way up and again on the way down.
This arc means that at distances closer than 36 yards, the bullet will likely impact above your point of aim. The extent of this difference is dependent on several factors including the height of your optic above the bore, the bullet’s velocity, and the ballistic coefficient of the bullet. These factors all play a part in calculating the bullet’s trajectory.
Why 36 Yards?
The 36-yard zero distance is a popular choice for several reasons, particularly in the context of certain shooting disciplines and firearm configurations. It often provides a useful balance between near and far-range accuracy for intermediate cartridges. It’s especially common with AR-15 style rifles chambered in 5.56 NATO/.223 Remington, where this zero provides a relatively flat trajectory out to 300 yards. This means the bullet won’t deviate too far above or below the line of sight within that range, simplifying aiming and reducing the need for significant holdover adjustments. The 36 yard zero is often referred to as the “Improved Battlesight Zero” or IBZ.
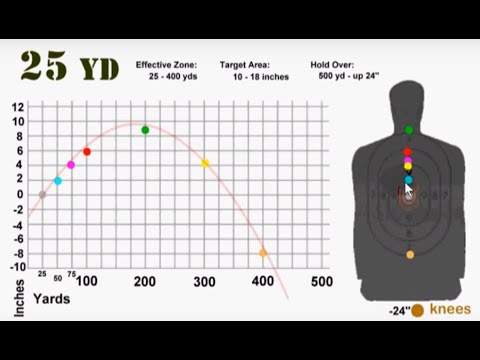
The Relationship Between a 36 Yard Zero and 25 Yard Impact
The relationship between a 36-yard zero and the bullet’s impact at 25 yards is crucial for efficient sight-in. Since the bullet’s trajectory is an arc, zeroing at 36 yards means the bullet will impact slightly low at 25 yards. The amount of this offset is very important for quickly zeroing your rifle. By understanding and predicting this offset, you can quickly zero your rifle at a shorter distance like 25 yards and be very close to zeroed at 36 yards.
The typical offset is between 1/2″ and 1″ low at 25 yards, but this is highly dependent on the factors mentioned previously (optic height, bullet velocity, ballistic coefficient). The best way to determine the proper offset is through experimentation and ballistic calculation.
Adjusting Your Rifle for a 25 Yard Zero Targeting a 36 Yard Zero
The process of adjusting your rifle to achieve a 36-yard zero by initially zeroing at 25 yards is a practical and time-saving technique. Here’s a step-by-step guide:
- Set Up Your Target: Place a target at 25 yards. A target with clearly marked grid lines (e.g., 1-inch squares) is highly recommended for precise adjustments.
- Establish a Stable Shooting Position: Use a stable rest or sandbags to minimize wobble. Consistency is key for accurate zeroing.
- Fire a Group of Shots: Aim at the center of the target and fire a group of 3-5 shots.
- Analyze Your Shot Group: Carefully examine the grouping of your shots. Measure the distance between the center of your shot group and the center of the target. This measurement will determine the necessary adjustments.
- Adjust Your Sights: Based on your shot group, adjust your sights accordingly. Most sights have markings for windage (left/right) and elevation (up/down) adjustments. Refer to your sight’s manual for the specific adjustment values (e.g., 1 click = 1/4 MOA at 100 yards, meaning 1 click will move the impact 1/16 of an inch at 25 yards).
- Repeat the Process: After making the adjustments, fire another group of shots. Analyze the new shot group and make further adjustments as needed. Repeat this process until your shots are consistently grouping approximately 1/2″ to 1″ low at 25 yards.
- Confirm at 36 Yards: Once you’ve achieved the desired impact at 25 yards, move your target to 36 yards and fire another group of shots to confirm your zero. Minor adjustments may be necessary at this stage.
Choosing the Right Ammunition
Ammunition selection plays a crucial role in achieving consistent accuracy. Different types of ammunition will have different ballistic properties, which will affect your bullet’s trajectory and point of impact. It’s essential to choose ammunition that is appropriate for your rifle and the intended purpose. Once you’ve chosen your ammunition, stick with it during the zeroing process and for all future shooting sessions. Switching ammunition can significantly alter your rifle’s zero, requiring you to re-zero your sights.
Understanding Minute of Angle (MOA) and Milliradians (MIL)
Minute of Angle (MOA) and Milliradians (MIL) are units of angular measurement used to adjust sights and estimate bullet drop. Understanding these units is crucial for making precise adjustments and achieving consistent accuracy. MOA is an angular measurement equal to approximately 1 inch at 100 yards. MIL is another angular measurement equal to approximately 3.6 inches at 100 yards. Most modern sights use either MOA or MIL adjustments, so it’s important to know which unit your sights use and how to convert between the two.
Advanced Techniques for Fine-Tuning Your Zero
Once you’ve achieved a basic zero, there are several advanced techniques you can use to further fine-tune your rifle’s accuracy. These techniques involve understanding and accounting for various factors that can affect your bullet’s trajectory, such as wind, temperature, and altitude.
- Windage Adjustments: Wind can significantly affect your bullet’s trajectory, especially at longer ranges. To compensate for wind, you’ll need to adjust your sights for windage. The amount of windage adjustment required will depend on the wind speed, wind direction, and the bullet’s ballistic coefficient.
- Elevation Adjustments: Elevation adjustments are necessary to compensate for bullet drop at longer ranges. The amount of elevation adjustment required will depend on the distance to the target and the bullet’s ballistic coefficient.
- Using a Ballistic Calculator: A ballistic calculator can help you predict your bullet’s trajectory and determine the necessary sight adjustments for various distances and environmental conditions. Ballistic calculators take into account factors such as bullet velocity, ballistic coefficient, wind speed, temperature, and altitude.
Maintaining Your Zero
Once you’ve achieved a consistent zero, it’s important to maintain it. Several factors can cause your rifle’s zero to shift, including changes in temperature, humidity, and altitude. Regular maintenance and inspection of your rifle and sights can help prevent these shifts. It is important to check the torque of all your screws and mounting hardware on a regular basis.
The Importance of a Quality Optic
A high-quality optic is essential for achieving consistent accuracy. A good optic will provide a clear and crisp image, allowing you to see your target clearly. It will also have precise and repeatable adjustments, ensuring that your sight adjustments are accurate and reliable. Investing in a quality optic is one of the best things you can do to improve your rifle’s accuracy.
Iron Sights vs. Optics
While optics offer enhanced precision and features, iron sights remain a reliable and valuable alternative. Iron sights are often more durable and less prone to failure than optics. They also require no batteries and are less susceptible to environmental factors. Many experienced shooters advocate for proficiency with iron sights as a backup or primary sighting system.
Real-World Applications and Scenarios
Understanding the 36-yard zero and its relationship to 25-yard adjustments has numerous practical applications in various shooting scenarios. Consider these examples:
- Competition Shooting: In competitive shooting events, speed and accuracy are paramount. A well-zeroed rifle allows you to quickly and accurately engage targets at various distances.
- Hunting: A properly zeroed rifle is essential for ethical and effective hunting. Knowing your rifle’s zero and bullet trajectory will help you make accurate shots and ensure a clean kill.
- Self-Defense: In a self-defense situation, accuracy can be critical. A well-zeroed rifle can provide you with the confidence and ability to defend yourself and your loved ones.
- Tactical Applications: In tactical situations, precision and reliability are essential. A properly zeroed rifle can help you effectively engage targets in a variety of environments and conditions.
Expert Insights on Optimizing Your Zero
Here are some additional tips and insights from experienced shooters and firearms experts:
- Focus on Consistency: Consistency is the key to accurate shooting. Maintain a consistent shooting position, grip, and trigger pull.
- Practice Regularly: Regular practice is essential for maintaining your shooting skills and staying familiar with your rifle.
- Seek Professional Instruction: Consider taking a shooting course from a qualified instructor. A good instructor can provide you with valuable feedback and help you improve your shooting technique.
- Don’t Overthink It: Zeroing your rifle doesn’t have to be a complicated process. Focus on the fundamentals and follow the steps outlined in this guide.
Achieving Accuracy Through a Solid Understanding
Mastering the concept of the 36-yard zero and its relationship to 25-yard adjustments is a fundamental skill for any serious rifle shooter. By understanding the underlying principles, following the practical steps outlined in this guide, and incorporating expert insights, you can optimize your rifle’s performance and achieve pinpoint accuracy in a variety of shooting scenarios. Remember, consistency, practice, and a commitment to continuous learning are the keys to becoming a proficient and accurate shooter. By taking the time to master these techniques, you’ll be well-equipped to handle any shooting situation with confidence and precision.
